Introduction
Read Consulting LLC was contacted by an industrial customer to aid in their process development. They had designed a specialized bolt that was used as an “adjuster screw”. During assembly, a large percentage of these bolts failed when assembled. The assignment was to determine the cause of the failures and determine how to distinguish good bolts from the bad. Representative bolt failures were analyzed. The failure analysis revealed that these fasteners failed due to hydrogen embrittlement.
Results Summary
The Subject fasteners failed due to hydrogen embrittlement. In addition, the difference in appearance between the screws from the affected lot and one from a “good” lot suggest that the affected screws had no post plate bake. Re-evaluation of the recent shipment revealed that there are two distinct types of bolts in the lot. Some are shiny and some are dull. Testing revealed that the shiny bolts showed embrittlement and the “dull” ones did not. Thus, the appearance of the bolts can be used to separate the good from the bad. Most likely the affected bolts were not baked after plating.
THE GOOD BOLTS HAVE A DULL FINISH; THE AFFECTED BOLTS ARE “SHINY”
Strategy
- Compare the appearance of the subject bolts to one of a previous lot that did not exhibit the present problem.
- Compare the hardness of the two types of VHM-25 bolts:
- Rockwell “C”
- Micro-hardness
- Document the fracture surfaces of the failed bolts that were submitted.
Part Description
The bolts in question are specified in a part drawing submitted by the user. This is a custom M6-1 metric screw. It is to be made from 4140/4142 or 4340 alloy steel. The finished screw is to be quenched and tempered to a hardness of Rockwell ‘C’ (RC) of 39 – 45. The finish is a zinc plate per ASTM F1941M-07 the plating thickness is to be 0.0001” to 0.0002”. In addition, a post plate bake is required to provide “hydrogen embrittlement relief”. Figure #1 is a photograph of the sample bolts sent for evaluation. The screw overall length is 5 ¼”.
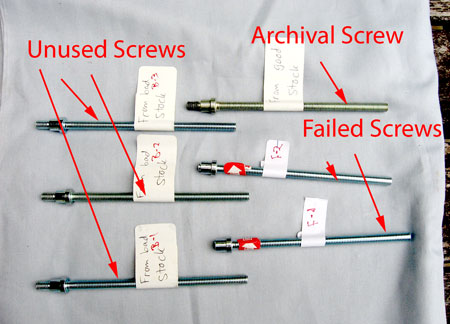
Figure #1: Photograph of the sample adjuster screws submitted to Read Consulting for evaluation. The lot consisted of one screw from a previous shipment that performed as expected (archival screw). In addition, from the affected lot, there were two failed screws and three unused screws. It is important to note that the “archival screw” has a dull finish when compared to the screws from the affected lot.
Hardness Rockwell “C” (Rc)
Note: Specified Hardness is Rockwell “C” from 39 to 45
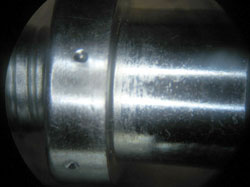
The screws from the affected lot had a Rc of 40. The archival screw’s hardness was measured to be 38. Both meet part specifications. These values may be low because these hardness measurements include the zinc plating. It is for this reason, micro-hardness measurements are necessary.
Micro-hardness
The screws from the affected lot had a VHN 370 to 430 (Rc 38 to 44) . The archival screw’s hardness was has VHN ranging from 390 to 415 (R 41 to 44). These values agree with the Rockwell test values.
 |
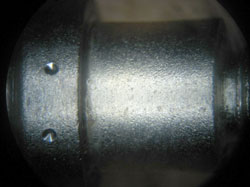 |
Figure #2: Photomicrographs of the Rc hardness indentations. All the measurements were made on the large diameter “collar” of the screw.
Fracture Surfaces
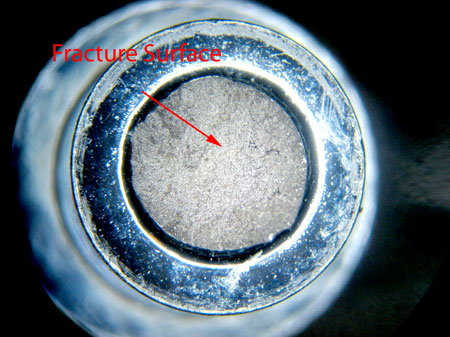
Figure #3: Photomicrograph of one of the fracture surfaces taken with an optical microscope (Mag. 15X).
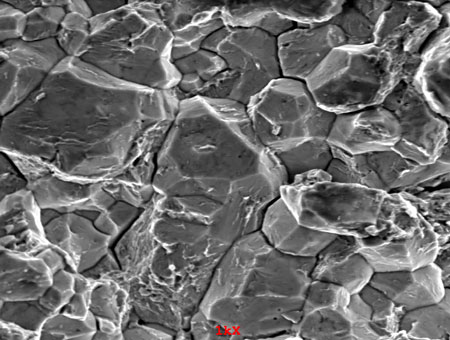
Figure #4: Photomicrograph of a representative fracture surface taken with a scanning electron microscope (SEM). The fracture is inter-granular, and this is typical of a failure caused by hydrogen embrittlement (Mag. 1000X).
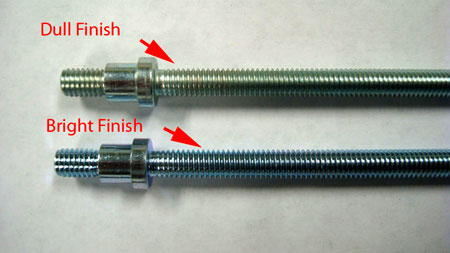
Figure #5: Examination of the suspected shipment lot revealed two types of bolts. One part consisted of shiny bolts; the other part of the shipment had bolts that had a duller appearance. Tests on representative samples of each showed that the shiny bolts suffer from hydrogen embrittlement, and the dull bolts do not have the problem. Thus, the affected bolts can be positively identified.


