Introduction: A glass pie plate was being used to melt caramel. When being removed from the oven, it fractured and injured the user.
Objective: Perform a failure analysis to determine the root cause of the fracture.
Description: Figure #1 shows the failed glass cookware in the as received condition. All the pieces are held together by the hardened caramel.
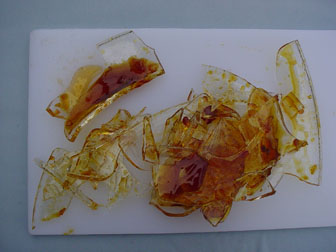
Figure #1: Broken glass dish in the as received condition. All the pieces are covered with the hardened caramel.
Procedure:
1. Rinse all the pieces with warm water to dissolve the hardened sugar solution.
2. Reassemble the broken dish in order to find the failure origin.
3. Trace the fracture back to the origin.
4. Microscopically examine the origin to determine the cause of failure..
5. Evaluate other anomalies with respect to the dish failure.
Results: Figure #2 shows the re-assembled glass dish. The origin is at the top of the photo.
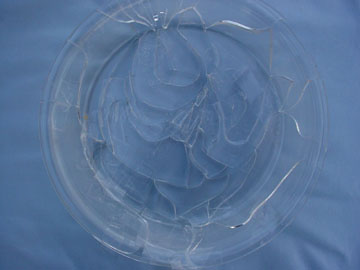
Figure #2: Photograph of the re-assembled dish. The failure origin is at the top of the photo. The “wandering” nature of the cracks leaving the origin indicates that the failure was driven by thermal stresses.
Figures 3 through 5 summarize the findings. The root cause of the failure was an oval shaped defect inside the glass.
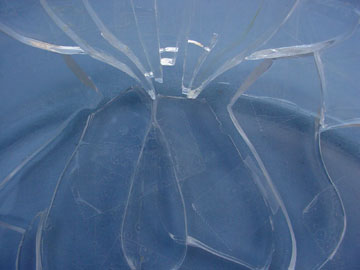
Figure #3: Close-up of the region of the fracture origin.
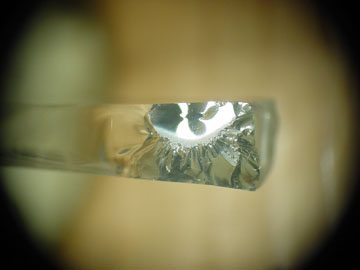
Figure #4: Low power micrograph of the failure origin. This failure originated in the interior of the glass (Mag. 12X).
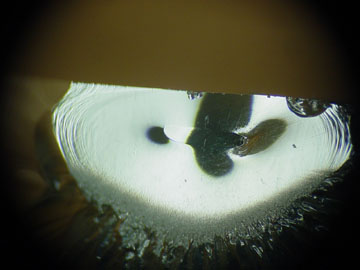
Figure #5: Low power micrograph of the failure origin. This failure originated in the interior of the glass. The Wallner lines emanate in all directions from an oval shaped defect. It appears that the defect is a collapsed bubble (seed) that did not “re-weld” (Mag. 40X).
Conclusion: The failure was a thermal crack that initiated at a flaw in the glass. The flaw appears to be a collapsed bubble in the glass. This is a manufacturing defect.
Additional Observation: There was a “cluster” of straight cracks. The fracture surfaces indicated that they were in regions where the glass surface compressive stresses in tensile stresses in the center (See Figure #6).
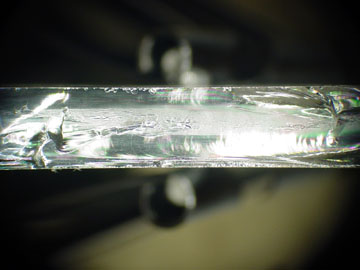
Figure #6: Photomicrograph of the type of fracture surface found on the straight cracks. The mist hackle in the center indicates significant tensile stresses in the center of glass. In addition, there are two sets of Wallner lines. This is similar to a “tempered glass” fracture surface, This crack traveled from right to left (Mag. 20X).


Very interesting the comments about the other ‘defect’ found which showed similar fracture pattern that is seen in tempered glass.
Not true, Tempered glass shows a completely different fracture pattern. Call to discuss 707-494-5089
THANK YOU FOR THE FEED BACK