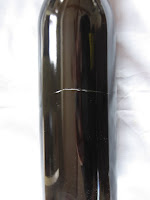

A glass expert was asked to examine poor quality bottles received by a winery. The issue was whether this product defect would significantly lower the strength of the bottle and would present a product liability problem. The photo on the upper left is a photograph of the manufacturing defect. It is a 4 inch horizontal “gash”. The center picture is a photo-micrograph of the defect cross-section. The cross-section shows that the edges of the defect are rounded. This is a molding defect that occured when the glass was at or above the its softening point. The edges of the defect are rounded; therefore, in the opinion of a manufacturing engineer, they are unlikely to cause a low stress bottle failure. The picture on the upper right is a photo-micrograph of the top of the defect. There is a thin sheet of glass over the center mound of the defect. It is believed that this defect was formed in the blow molding step of the bottle manufacturing process.


